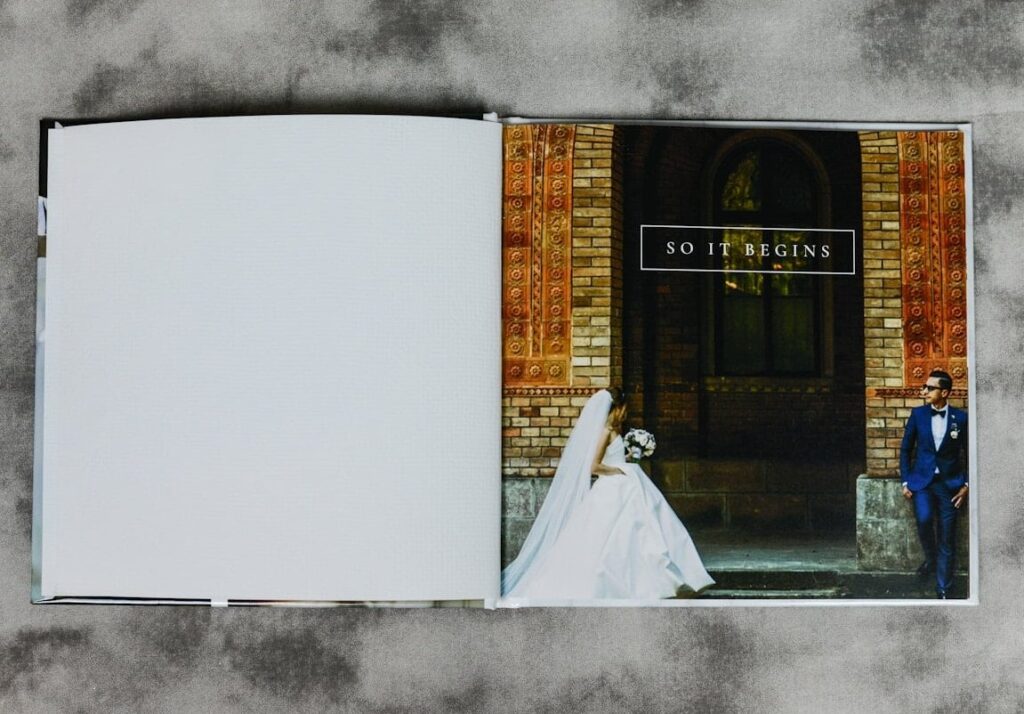
Author name: Jose Moultry

Best Lenses for Wedding Photography in 2026: Primes, Zooms, and Budget Picks

Best Lenses for Wedding Photography in 2026: Primes, Zooms & Budget Picks Compared Choosing the right glass can make or break your wedding images. Whether you are building your first wedding kit or upgrading to mirrorless in 2026, the lens lineup you carry determines how you capture every moment, from getting-ready details to the last dance. In this guide we break down the best lenses for wedding photography across every focal length, compare primes versus zooms, highlight the top picks for Canon, Sony, and Nikon shooters, and include budget-friendly alternatives so you can deliver stunning results without draining your bank account. Why Your Lens Choice Matters More Than Your Camera Body Camera bodies come and go, but great lenses hold their value and directly affect image quality, bokeh, low-light performance, and autofocus accuracy. At a wedding you face rapidly changing light, tight timelines, and unrepeatable moments. A fast, sharp lens gives you the confidence to nail the shot every single time. Key factors to consider when picking wedding lenses: Maximum aperture – f/1.4 to f/2.8 lets in more light and creates beautiful background separation. Autofocus speed and accuracy – critical during fast-paced ceremonies and receptions. Weight and size – you will carry your gear for 10+ hours. Weather sealing – outdoor ceremonies are unpredictable. Focal length versatility – different parts of the day demand different perspectives. Quick-Glance Comparison: Top Wedding Lenses in 2026 Lens Category Top Pick Budget Alternative Best For Wide-angle prime Sony 24mm f/1.4 GM Sigma 24mm f/1.4 DG DN Art Venue shots, reception, dancing 35mm prime Sigma 35mm f/1.4 DG DN Art Nikon Z 35mm f/1.8 S Ceremony overview, getting ready, candids 50mm prime Canon RF 50mm f/1.2L USM Canon RF 50mm f/1.8 STM (“Nifty Fifty”) Portraits, details, couple sessions 85mm prime Sony 85mm f/1.4 GM II Viltrox 85mm f/1.8 II Portraits, ceremony from the aisle Standard zoom Nikon Z 24-70mm f/2.8 S Tamron 28-75mm f/2.8 Di III G2 All-day workhorse Telephoto zoom Canon RF 70-200mm f/2.8L IS USM Z Sigma 70-200mm f/2.8 DG DN OS Sport Ceremony, speeches, candid moments The Best Zoom Lenses for Wedding Photography 24-70mm f/2.8: The All-Day Workhorse If you could only bring one lens to a wedding, the 24-70mm f/2.8 would be the safest choice. It covers wide environmental shots at 24mm and flattering half-body portraits at 70mm, all with a constant f/2.8 aperture that handles dim churches and moody receptions. Top picks for 2026: Sony FE 24-70mm f/2.8 GM II – lightweight, razor-sharp, fast linear AF motors. Nikon Z 24-70mm f/2.8 S – outstanding corner-to-corner sharpness. Canon RF 24-70mm f/2.8L IS USM – built-in image stabilization is a bonus for video-hybrid shooters. Budget alternative: The Tamron 28-75mm f/2.8 Di III G2 (available for Sony and Nikon Z) delivers 90% of the performance at roughly half the price. You sacrifice a little on the wide end (28mm vs. 24mm), but for most wedding scenarios the difference is minimal. 70-200mm f/2.8: The Ceremony & Candid King The 70-200mm f/2.8 is the second lens most wedding pros reach for. It lets you capture emotional moments from a respectful distance during the ceremony, compress backgrounds for dramatic couple portraits, and isolate subjects during speeches and toasts. Top picks for 2026: Canon RF 70-200mm f/2.8L IS USM Z – compact internal-zoom design, blazing fast Dual Nano USM. Sony FE 70-200mm f/2.8 GM OSS II – the lightest in its class, excellent for long wedding days. Nikon Z 70-200mm f/2.8 VR S – tack-sharp across the frame with smooth VR. Budget alternative: The Sigma 70-200mm f/2.8 DG DN OS Sport is a serious contender at a lower price point, with optical stabilization and weather sealing that rivals first-party lenses. The Best Prime Lenses for Wedding Photography Prime lenses trade zoom convenience for wider apertures, lighter weight, and often superior optical quality. Many wedding photographers carry two or three primes and swap between bodies instead of zooming. 24mm f/1.4: Wide-Angle Storytelling A 24mm prime excels at capturing the energy of the dance floor, grand venue interiors, and environmental portraits that show off a beautiful location. The f/1.4 aperture is a lifesaver in dark reception halls. When to use it: evening party, first dance, sparkler exits, wide ceremony establishing shots. Top pick: Sony 24mm f/1.4 GM – compact, feather-light (only 445 g), and incredibly sharp. Budget alternative: Sigma 24mm f/1.4 DG DN Art – optically excellent at a significantly lower cost. 35mm f/1.4: The Most Versatile Wedding Prime The 35mm focal length is arguably the most popular prime among wedding photographers. It is wide enough to capture a ceremony overview with guests yet tight enough for natural-looking candid portraits. Many photographers call it their “if I had to pick one prime” lens. When to use it: getting-ready scenes, bridal party group shots, ceremony overview, couple walking shots. Top picks: Sigma 35mm f/1.4 DG DN Art – outstanding value and image quality across Sony, Nikon Z, and L-mount. Canon RF 35mm f/1.4L VCM – hybrid-friendly with smooth video AF. Nikon Z 35mm f/1.4 – compact, sharp, and well-balanced on Z bodies. Budget alternative: Nikon Z 35mm f/1.8 S or Sony FE 35mm f/1.8 give you excellent performance with only a half-stop less light. 50mm f/1.2 or f/1.4: The Classic Portrait Lens A 50mm sees roughly the same field of view as the human eye, which is why images shot at this focal length feel so natural. It is perfect for intimate couple portraits, detail flat lays, and emotional candid moments. When to use it: ring and detail shots, bride and groom portraits, candid table moments, first look. Top picks: Canon RF 50mm f/1.2L USM – dreamy bokeh and razor-sharp focus plane. Nikon Z 50mm f/1.2 S – the best 50mm Nikon has ever made. Sony FE 50mm f/1.4 GM – smaller and lighter than the competition with GM-level optics. Budget alternative: Every system has an affordable 50mm f/1.8. The Canon RF 50mm f/1.8 STM, Nikon Z 50mm f/1.8 S, and Sony FE 50mm f/1.8 are all sharp, lightweight,

Best Lenses for Wedding Photography in 2026: Primes, Zooms, and Budget Picks Read More »

How to Photograph Wedding Details with a Flat Lay: Step-by-Step Guide

Why Flat Lay Wedding Photography Matters More Than Ever Flat lay wedding photography has become one of the most sought-after styles for capturing the small but meaningful details of a wedding day. From the invitation suite to the rings, the perfume bottle to the shoes, a well-composed flat lay tells the story of the day before the ceremony even begins. But here is the thing: creating a flat lay that looks effortless and editorial takes real skill, preparation, and practice. If your flat lays ever feel cluttered, inconsistent, or just “off,” you are not alone. Many photographers struggle with this specific skill. In this guide, we break down every step of the process so you can produce stunning, consistent flat lay compositions at every wedding you shoot. Whether you are a working wedding photographer looking to level up your detail game or a couple who wants to understand what goes into those beautiful detail shots, this tutorial covers everything from surfaces and props to lighting and camera angles. What Is a Wedding Flat Lay? A wedding flat lay is a styled arrangement of wedding-related items placed on a flat surface and photographed from directly above (or near-directly above). The goal is to create a cohesive, visually appealing composition that highlights the couple’s personal details and sets the editorial tone for the wedding gallery. Think of it as a curated still life. Every element is intentional, from the placement of a ribbon to the angle of an envelope. What to Include in Your Wedding Flat Lay Before you can style anything, you need to know what items to gather. Here is a comprehensive list broken into categories: Bride’s Details Invitation suite (invitation, RSVP card, envelope, details card, belly band) Engagement ring and wedding bands Perfume or cologne bottle Earrings, necklace, bracelet, or other jewelry Hair accessories (pins, combs, veils clips) Shoes (sometimes placed beside the flat lay rather than in it) Clutch or small handbag Personal vow booklets Garter “Something old, something new” items Groom’s Details Watch Cufflinks Tie or bow tie Pocket square Boutonniere Cologne Personal vow booklets Belt or suspenders Shared or General Items Wedding day timeline or program Menu cards or place cards Wax seal stamps Ribbon or silk remnants Fresh florals or loose petals Heirloom or sentimental items (lockets, photos, charms) Pro tip: Send your couple a checklist ahead of the wedding day so they know exactly what items to set aside for you. This saves precious time during the getting-ready window. Step 1: Choose the Right Surface and Background Your background sets the tone for every single shot. It is the foundation of the entire composition, and choosing the wrong one can make even beautiful items look cheap or disjointed. Best Surface Options for Wedding Flat Lays Surface Type Best For Things to Watch Styling mats (linen, plaster, stone texture) Consistent editorial look across all weddings Invest in neutral tones that match a variety of color palettes Silk or linen fabric Soft, romantic, fine-art aesthetic Wrinkles can be distracting; steam or iron beforehand Marble tile or slab Luxury, modern, clean compositions Can be heavy to transport; consider thin porcelain tiles Wooden surfaces Rustic, warm, natural weddings Avoid heavily grained wood that competes with the items Handmade paper or vellum Textured, artisan-style flat lays Works best layered on top of another surface for dimension Key rule: The background should complement the items, never compete with them. When in doubt, go neutral. Whites, creams, soft grays, and muted taupes work with nearly every wedding palette. Step 2: Build Your Flat Lay Styling Kit Showing up to a wedding without your own styling props is like showing up without a memory card. You need a dedicated kit that travels with you. Essential Flat Lay Kit Contents 2 to 3 styling mats or surfaces in different tones and textures Silk ribbons in ivory, blush, dusty blue, sage, and black Styling blocks or acrylic risers to add depth and dimension under stationery pieces Ring box or ring dish (a beautiful backup in case the couple’s ring box is not photogenic) Wax seal and loose wax beads for adding texture Loose florals (dried or faux work well as backups; fresh is always preferred) Tweezers or small tongs for precise placement of delicate items Double-sided tape and museum putty to hold items in place Small scissors for trimming ribbon ends Flat lay board or portable surface (rigid foam board works in a pinch) Flat lays should feel dynamic, not one-dimensional. Styling blocks are an underrated tool. Placing them underneath stationery pieces or fabric creates subtle shadows and layers that give your composition a three-dimensional quality even in a two-dimensional photo. Step 3: Understand Light for Flat Lay Photography Light is everything when it comes to flat lay photography. The difference between a flat (pun intended), lifeless detail shot and a luminous, editorial image almost always comes down to lighting. Natural Light Is Your Best Friend Whenever possible, use soft, diffused natural light. Here is how to find and shape it on a wedding day: Find a large window with indirect light. North-facing windows are ideal because they provide even, diffused illumination without harsh sun. Place your flat lay surface near the window, positioning it so the light falls at roughly a 45 to 90 degree angle to the surface. Use a white reflector or foam board on the opposite side of the light source to gently bounce light back and fill shadows. Avoid direct sunlight hitting your flat lay. Harsh shadows from direct sun will ruin the soft, even look you want. Sheer curtains act as natural diffusers. If the light is too strong, draw them closed. What About Artificial Light? If you are stuck in a dim hotel room or a venue with no natural light, you can use a continuous LED panel or an off-camera flash bounced into a white ceiling or through a diffuser. The goal is always soft, even, directional light. Lighting Mistakes to Avoid Overhead fluorescent lights

How to Photograph Wedding Details with a Flat Lay: Step-by-Step Guide Read More »

How to Plan a Courthouse Wedding That Still Feels Special

Why Courthouse Weddings Deserve Just as Much Love A courthouse wedding does not have to feel like a quick errand at city hall. More and more couples are choosing intimate legal ceremonies on purpose, not as a backup plan, but as a genuine reflection of what matters to them: each other, a few loved ones, and a meaningful moment without the stress (or price tag) of a traditional wedding. Whether you are drawn to the simplicity, the affordability, or the charm of a historic building, a courthouse wedding can be deeply personal and beautiful when you put a little thought into the details. This guide is packed with courthouse wedding ideas to help you plan a ceremony that feels every bit as special as a grand affair, plus tips for capturing meaningful photos you will treasure forever. Before the Day: Planning Your Courthouse Wedding 1. Choose a Picturesque Courthouse Not every courthouse looks the same. Some feature stunning architecture, marble staircases, large windows with natural light, or beautiful outdoor grounds. Before you commit to your local option, do a little research. Search online for photos of courthouses in your city or nearby towns. Visit in person to scout the best backdrops for photos. Ask the clerk’s office about which rooms are available and whether you can choose your ceremony location within the building. A courthouse with character, think tall ceilings, vintage doors, or a grand staircase, instantly elevates the look and feel of your photos. 2. Research Marriage License Requirements Early Every state and county has different rules regarding waiting periods, required documents, and fees. Give yourself plenty of time so there are no last-minute surprises. Detail What to Check Waiting period Some states require 24-72 hours between license and ceremony ID requirements Valid government-issued photo ID, sometimes birth certificate Witnesses Many locations require 1-2 witnesses present Appointment Some courthouses require appointments; others accept walk-ins Fees Typically $30-$100 depending on location 3. Pick the Right Day and Time Courthouses can be busy, especially on Fridays. Consider scheduling your ceremony on a Tuesday or Wednesday morning when the building is quieter. You will have more space, less background noise, and better opportunities for photos without crowds. Courthouse Wedding Outfit Ideas One of the most fun parts of planning a courthouse wedding is choosing what to wear. The dress code is entirely up to you, and there are no rules that say you need a floor-length gown or a three-piece suit. For the Bride or Partner A A chic midi dress in white, ivory, or even a bold color A tailored jumpsuit for a modern, fashion-forward look A simple slip dress paired with statement earrings A vintage-inspired tea-length dress for old-school charm A blazer dress or power suit in cream or blush For the Groom or Partner B A well-fitted suit in navy, charcoal, or tan Separates: a crisp button-down with tailored trousers and nice shoes A bold tie or pocket square to add personality Suspenders and a bow tie for a vintage vibe Matching Details Consider coordinating a small detail between both outfits: matching boutonnieres, complementary colors, or similar textures. These little touches show up beautifully in photographs. How to Personalize Your Courthouse Ceremony Even though courthouse ceremonies tend to be short (often 10-15 minutes), there are many ways to make the experience feel uniquely yours. 4. Write Your Own Vows Most courthouses will allow you to read personal vows in addition to (or instead of) the standard script. This is the single most impactful way to make the ceremony feel intimate and emotional. Even a few heartfelt sentences can transform the moment. 5. Bring a Bouquet and Boutonniere A small, beautiful bouquet adds color and romance to every photo. You do not need to spend a fortune. Options include: A hand-tied bouquet from a local florist ($30-$75) A single-stem flower like a peony or garden rose Dried or preserved flowers for a lasting keepsake A grocery store bouquet arranged with a ribbon 6. Include a Unity Ritual Even in a small ceremony, you can incorporate a symbolic gesture: Ring warming: Pass your rings among your guests so each person can silently bless them. Sand ceremony: Blend two colors of sand into one vessel. Handfasting: Have your hands tied with a ribbon or cord. Wine box ceremony: Seal a bottle of wine with letters to open on an anniversary. 7. Play Your Favorite Song Ask the officiant if you can play a song on your phone or a small speaker during the ceremony. A meaningful song playing softly in the background can set the mood instantly. 8. Involve Your Guests If you are bringing a small group of loved ones, give them a role. Ask your best friend to do a short reading, have a parent hold the rings, or let a sibling take a candid video on their phone. Photography Tips for Courthouse Weddings This is where many couples worry. Courthouses can be small, dimly lit, and not always “Instagram-ready.” But with the right approach, you can get stunning, meaningful photos from your day. 9. Hire a Photographer (Even for 30 Minutes) Many photographers offer elopement or micro-wedding packages specifically designed for courthouse ceremonies. Even a short session of 30-60 minutes can yield dozens of beautiful images. Look for a photographer experienced in shooting in small or low-light spaces. 10. Scout the Location for Photo Spots Visit the courthouse beforehand and look for: Large windows with natural light Staircases or interesting architecture Outdoor areas like courtyards, steps, or nearby parks Clean, simple walls that create a timeless backdrop Hallways with leading lines 11. Use the Surroundings Creatively The area around the courthouse often provides better photo opportunities than the building itself. Think about: A nearby city street for an urban editorial feel A park or garden within walking distance A coffee shop or restaurant where you can grab a celebratory drink A rooftop or bridge with a skyline view 12. Capture the Candid Moments Some of the best courthouse

How to Plan a Courthouse Wedding That Still Feels Special Read More »

Tall vs Low Centerpieces: Which Look Better in Wedding Photos?

Tall vs Low Centerpieces: Which Actually Look Better in Wedding Photos? Choosing between tall and low centerpieces is one of those wedding decisions that feels purely aesthetic until you see the reception photos. Suddenly, what looked gorgeous in person either shines on camera or falls completely flat. As a wedding photography and design resource, we have seen hundreds of receptions styled both ways. The truth is that tall vs low centerpieces wedding decisions affect far more than table decor. They shape sightlines, guest interaction, venue atmosphere, and most importantly, how your photos turn out. In this guide, we break down both options side by side so you can make a confident, photo-friendly choice for your big day. What Counts as a Tall Centerpiece vs a Low Centerpiece? Before diving into the comparison, let’s define the basics: Low centerpieces are arrangements that sit at roughly 12 to 14 inches tall. They stay well below eye level when guests are seated. Tall centerpieces typically start at 24 inches and can reach 36 inches or higher. They are designed to rise above the heads of seated guests, leaving a clear view underneath. The critical rule both styles should follow: guests must be able to see the person sitting directly across from them without leaning or craning their neck. If your centerpiece blocks that sightline, it is the wrong height. How Tall and Low Centerpieces Look in Wedding Photos Photography is where the tall vs low centerpieces debate gets really interesting. Each style creates a distinctly different visual story in your images. Tall Centerpieces in Photos Draw the eye upward, creating a sense of grandeur and elegance in wide-angle reception shots. Interact beautifully with chandeliers, string lights, and uplighting, adding layers of depth to the frame. Make large ballrooms and high-ceiling venues look intentionally filled rather than empty. Create a dramatic “forest canopy” effect when photographed from guest level. Can partially obscure faces in candid shots if the photographer is shooting from certain angles across the table. Low Centerpieces in Photos Keep guests’ faces completely visible, which makes candid table shots much easier for your photographer. Amplify candlelight and warm tones at table level, producing soft and intimate close-up images. Draw attention to the rest of the table decor like place settings, linens, and favors. Work exceptionally well for flat-lay style overhead table shots (a popular angle in modern wedding photography). May leave the upper portion of the frame empty in wide venue shots, especially in tall or open spaces. Side-by-Side Comparison: Tall vs Low Centerpieces Wedding Factor Tall Centerpieces Low Centerpieces Typical Height 24 to 36+ inches 8 to 14 inches Best Venue Type Ballrooms, high ceilings, large spaces Intimate venues, outdoor tents, low ceilings Guest Sightlines Clear below the arrangement; flowers sit above heads Completely unobstructed across the table Conversation Impact Good if elevated properly; can feel divided if stems block view Encourages natural, easy cross-table conversation Photo Style Favored Wide venue shots, dramatic angles, editorial style Candid table shots, overhead flat-lays, intimate portraits Venue Scale Effect Fills vertical space; makes large rooms feel cohesive Can leave upper space bare; makes small rooms feel open Lighting Interaction Works with chandeliers and overhead uplighting Pairs beautifully with candles and low ambient light Average Cost Higher (more florals, structural supports, vessels) Lower (less material, simpler construction) Setup Complexity Higher; requires stability testing and careful transport Simpler; easier to transport, adjust, and swap The Photography Angle Breakdown Your wedding photographer’s shooting style matters a lot in this decision. Here is how each centerpiece height interacts with common photography angles: 1. Wide Room Shots (Venue Overview) Tall centerpieces are the clear winner here. When a photographer captures the full reception from an elevated position or balcony, tall arrangements fill the vertical middle of the frame and create visual rhythm across the room. Low centerpieces can make a large ballroom look sparse from this angle. 2. Table-Level Candid Shots Low centerpieces win. When your photographer moves through the reception capturing guests laughing, toasting, and talking, a low arrangement keeps every face in the frame. Tall centerpieces with wide bases or dense stems can block the shot at this angle. 3. Detail and Flat-Lay Shots Low centerpieces photograph much better from directly above. The arrangement, place settings, menu cards, and glassware all fit into one clean, styled composition. Tall centerpieces are nearly impossible to capture well from overhead. 4. Guest Table Portraits Both can work. With tall centerpieces, the photographer can frame guests beneath the elevated arrangement for a dramatic look. With low centerpieces, the photographer gets an uncluttered background that puts the focus entirely on the people. 5. Romantic Couple Shots at the Sweetheart Table Low and lush arrangements tend to photograph better for close-up couple portraits. They frame the couple without competing with them. Tall arrangements can create stunning shots from further away, where the couple appears framed under the elevated flowers. When to Choose Tall Centerpieces Go with tall centerpieces if: Your venue has high ceilings (ballrooms, cathedrals, converted warehouses with open rafters). You want a formal, editorial, or black-tie feel in your photos. You are hosting a large reception and need the decor to fill visual space so the room does not look empty. Your venue has dramatic overhead lighting like chandeliers or hanging installations that the centerpieces can complement. You want your photographer to capture sweeping, dramatic wide shots of the reception. Design Tips for Tall Centerpieces Use a slender riser or clear glass vase so the stem of the arrangement does not block cross-table views. Keep the floral “cloud” at the top airy and loose rather than dense and heavy. This photographs lighter and more naturally. Add small accent arrangements or candles at the base of the tall piece so the table itself is not bare in close-up photos. Ask your florist about stability. Tall arrangements that wobble or tip during the reception create stress and can ruin shots. Ensure the lowest point of the elevated arrangement sits at least 14

Tall vs Low Centerpieces: Which Look Better in Wedding Photos? Read More »

Golden Hour Wedding Portraits: How to Plan and Get the Best Light

Why Golden Hour Wedding Photos Are Worth Planning Your Entire Day Around If you have ever scrolled through wedding galleries and wondered why some portraits look absolutely breathtaking with warm, glowing light while others fall flat, the answer is almost always golden hour. That short window of soft, warm sunlight can transform an ordinary couple portrait into something truly magical. But here is the thing most couples overlook: golden hour does not just happen by accident on your wedding day. You have to plan for it. In this guide, we will walk you through exactly what golden hour is, how to calculate it for your specific wedding date and location, and how to build enough time into your schedule so you never miss that perfect light. What Exactly Is Golden Hour? Golden hour is the period of time roughly one hour before sunset (or one hour after sunrise). During this window, the sun sits low on the horizon, producing light that is: Warm in tone with rich golden and amber hues Soft and directional rather than harsh and overhead Diffused and even, which means fewer unflattering shadows on faces Naturally flattering for all skin tones Because the light travels through more of the atmosphere at this angle, it scatters in a way that creates that dreamy, romantic quality you see in the best golden hour wedding photos. The effect is impossible to replicate with artificial lighting alone. Golden Hour vs. Blue Hour: What Is the Difference? Right after golden hour ends, you get what photographers call blue hour. This is the 20 to 30 minutes after the sun dips below the horizon when the sky takes on deep blue and purple tones. Blue hour photos have a completely different mood: cooler, moodier, and more dramatic. Many photographers love to capture a few frames during both windows if the timeline allows. Why Golden Hour Light Makes Wedding Photos Look So Good There is a reason golden hour wedding photos consistently rank as the most popular images in any wedding gallery. Here is what the light actually does for your portraits: 1. Backlit Glow and Rim Light When the photographer positions you with the sun behind you, the low-angle light wraps around your hair and shoulders, creating a luminous rim of light. This is especially stunning with veils, loose hairstyles, and flowing fabrics. 2. Lens Flare and Sun Bursts That beautiful, hazy lens flare you see in editorial wedding photos? It comes naturally during golden hour. The low sun produces organic flares that add warmth and atmosphere without any post-production trickery. 3. Even, Forgiving Light Midday sun creates harsh shadows under eyes, noses, and chins. Golden hour light is soft and even, meaning your photos will look natural and balanced with no unflattering shadows in sight. 4. Rich, Warm Skin Tones The golden color temperature of this light warms up every skin tone beautifully. Couples consistently say their golden hour portraits are the images where they feel they look their best. 5. Dramatic Skies As the sun lowers, clouds pick up shades of pink, orange, and gold. This gives you a natural backdrop that no venue decor could ever match. How to Calculate Golden Hour for Your Wedding Day Golden hour is not the same time every day. It shifts depending on your date, location, and time of year. Here is how to figure out exactly when it will happen on your wedding day. Step 1: Find Your Sunset Time Use a reliable tool to look up the sunset time for your wedding venue’s exact location on your wedding date. Some trusted options include: TimeAndDate.com (search by city and date) SunCalc.org (visual sun position map) The PhotoPills app (popular with professional photographers) Step 2: Count Backward Once you know the sunset time, golden hour begins roughly 60 minutes before sunset and the most intense, warmest light happens in the final 30 to 45 minutes before the sun disappears. Step 3: Account for Your Venue’s Landscape This is a step many couples forget. If your venue is surrounded by tall trees, mountains, or buildings, the sun may effectively “set” earlier than the official sunset time because it drops behind those obstructions. Visit your venue at the same time of year if possible, or ask your photographer to scout the location. Quick Reference: Golden Hour Estimates by Season (Northern Hemisphere) Season Approximate Sunset Range Golden Hour Starts Around Spring (Apr – May) 7:30 PM – 8:30 PM 6:30 PM – 7:30 PM Summer (Jun – Aug) 8:00 PM – 9:00 PM 7:00 PM – 8:00 PM Autumn (Sep – Nov) 5:30 PM – 7:30 PM 4:30 PM – 6:30 PM Winter (Dec – Mar) 4:30 PM – 5:30 PM 3:30 PM – 4:30 PM These times are rough estimates for mid-latitude locations (like the central US, UK, or central Europe). Always look up the exact time for your specific venue and date. How to Build Golden Hour Into Your Wedding Timeline This is where the real planning comes in. Knowing when golden hour happens is only half the battle. You also need to structure your entire wedding day so you are free and available during that window. The Ideal Timeline Formula A widely recommended approach among wedding photographers is: Schedule your ceremony to end at least 2 hours before sunset. This gives you buffer time for the ceremony running slightly long, family formal photos, and a cocktail hour transition. Begin couple portraits 45 to 60 minutes before sunset. This lets you start shooting in the early golden light and build toward the most dramatic moments as the sun gets lower. Plan for 20 to 30 minutes of dedicated couple portrait time. That is enough for a skilled photographer to capture a variety of poses, angles, and lighting setups. Sample Summer Wedding Timeline (Sunset at 8:30 PM) Time Activity 5:30 PM Ceremony begins 6:00 PM Ceremony ends 6:00 – 6:30 PM Family and wedding party group photos 6:30 – 7:30 PM Cocktail hour for

Golden Hour Wedding Portraits: How to Plan and Get the Best Light Read More »

How to Incorporate Your Dog into Your Engagement Photos

Why Engagement Photos with Your Dog Are Totally Worth It Your dog is family. So when it comes time to celebrate one of the biggest milestones of your life, leaving your four-legged best friend out of the picture just feels wrong. Including your dog in engagement photos adds a personal, heartfelt touch that no prop or backdrop can replicate. Plus, some of the most genuine smiles and candid laughter happen when a pup is involved. But let’s be honest: dogs don’t exactly follow directions. They sniff, they wiggle, they bolt after squirrels. That’s why a little planning goes a long way. In this guide, we’re sharing 12 practical tips and creative ideas to help you get stunning engagement photos with your dog, without the stress. Before the Shoot: Planning and Logistics 1. Hire a Photographer Who Has Pet Experience Not every photographer is comfortable working with animals. Before you book, ask whether they’ve done engagement photos with dogs before. An experienced pet-friendly photographer will know how to work with unpredictable moments, adjust angles to include a leash-free look, and use burst mode to catch the perfect tail wag. Pro tip: Ask to see sample galleries from past sessions that included pets. This gives you a clear picture of what to expect. 2. Bring a Dog Handler (This Is Non-Negotiable) This is one of the most important logistics to get right. A dog handler is a friend, family member, or even a professional pet sitter who stays just off-camera and manages your dog between shots. Their job is to: Hold the leash when your dog isn’t in the frame Grab your dog’s attention with treats or squeaky toys Step in quickly if your pup gets overstimulated Keep water and waste bags handy Without a handler, one of you will always be distracted. With one, you can fully focus on each other and let your dog shine when it’s their turn. 3. Choose a Dog-Friendly Location Location selection matters more when a pet is involved. You need a spot where dogs are welcome, safe, and comfortable. Here are some great options: Location Type Why It Works Things to Check Public park Open space, natural light, greenery Leash laws, permit requirements Beach Beautiful backdrop, dogs love it Dog-friendly hours, tide schedule Hiking trail Adventure vibe, scenic variety Trail difficulty, dog regulations Your own backyard Dog is relaxed, familiar territory Background clutter, lighting Urban downtown Modern, stylish look Noise level, foot traffic, dog comfort If you’re unsure, ask your photographer for recommendations. They often know hidden gems that are both photogenic and pet-friendly. 4. Time It Right Timing affects both the lighting and your dog’s energy level. The golden hour (the hour after sunrise or before sunset) gives you that warm, glowing light that looks gorgeous in photos. But there’s another reason to choose these times: it’s cooler. Dogs overheat quickly, especially on warm days. Scheduling your session during cooler parts of the day keeps your pup comfortable and cooperative. Avoid midday shoots in summer at all costs. 5. Exercise Your Dog Before the Session A tired dog is a well-behaved dog. Take your pup for a long walk or play a vigorous game of fetch an hour or two before your shoot. This burns off excess energy and makes them much more likely to sit still, look at the camera, and not drag you across the field chasing a bird. During the Shoot: Getting Natural-Looking Shots 6. Start with Dog-Inclusive Shots First Dogs have a limited window of patience and cooperation. Use it wisely. Most photographers recommend doing the dog portion of your engagement session first, while your pup is fresh and excited. After you’ve captured the best pet shots, your handler can take your dog for a walk or let them rest in the car (weather permitting) while you finish the couples-only portion. 7. Use Treats and Noise Makers Strategically Getting a dog to look at the camera is an art form. Here’s what works: High-value treats: Small, smelly treats like freeze-dried liver get instant attention. Have the photographer or handler hold one near the lens. Squeaky toys: A quick squeak right before the shutter clicks can get perfect ear perks and alert expressions. Crinkly sounds: The sound of a treat bag crinkling works wonders for food-motivated dogs. Your voice: Sometimes just saying your dog’s name in an excited tone is all it takes. Important: Don’t overdo treats. A dog with a full mouth or one who’s frantically licking their lips doesn’t photograph well. Use treats sparingly and reward after the shot. 8. Let Your Dog Be a Dog The best engagement photos with dogs aren’t overly posed. They capture real moments: your dog leaning against your leg, jumping up for a kiss, walking between the two of you, or just sitting happily while you hold each other. Let your photographer capture those in-between moments. Some of the most heartwarming shots happen when you’re not even trying. Laugh when your dog does something silly. Let them sniff around. The candid chaos is what makes these photos feel authentic and uniquely yours. 9. Handle the Leash Situation Leashes can be tricky in photos. Here are a few approaches: Use a thin, neutral-colored leash that blends with the background. Avoid bright neon or retractable leashes. Have your handler hold the leash from behind and let the photographer crop or edit it out later. Go off-leash only if your dog has reliable recall and the area is safely enclosed. Never risk your dog’s safety for a photo. Try a long lead (15-20 feet) so your dog has room to move naturally while still being under control. Creative Ideas for Engagement Photos with Your Dog 10. Fun Props and Accessories A little accessorizing can make your dog part of the engagement story. Here are some ideas couples love: Engagement bandana: A custom bandana that says something like “My humans are getting married” or “Will you marry my mom/dad?” Flower collar or wreath: A small floral

How to Incorporate Your Dog into Your Engagement Photos Read More »

What Questions to Ask a Wedding Photographer Before Booking

Why You Need the Right Questions to Ask a Wedding Photographer Choosing a wedding photographer is one of the most important decisions you will make during your wedding planning journey. Your photos are what remain long after the cake is eaten and the flowers have wilted. Yet so many couples walk into a photographer consultation without a clear idea of what to ask, and end up regretting it later. This guide gives you a comprehensive, organized list of questions to ask a wedding photographer before you sign anything. We have grouped them into clear categories so you can walk into every consultation feeling confident, prepared, and ready to find the perfect match for your big day. Questions About Experience and Background Before anything else, you want to know who you are hiring. Experience matters, but so does personality and passion. Start here: How long have you been photographing weddings specifically? General photography experience is great, but weddings are a unique beast. How many weddings have you photographed in total? Have you shot at our venue before? If yes, ask to see sample galleries from that venue. Do you specialize in any particular type of wedding? (Outdoor, cultural, elopement, large-scale, etc.) Can we see two or three full wedding galleries? Not just highlight reels. Full galleries reveal consistency. Do you love what you do? This might sound casual, but their enthusiasm (or lack of it) tells you a lot. What drew you to wedding photography? Have you received any awards or industry recognition? Pro tip: Pay attention to how they describe past weddings. A photographer who speaks warmly about their couples is likely someone who genuinely cares about the work. Questions About Availability and Logistics Logistics can make or break a wedding day. Do not skip these practical questions: Is our wedding date available? Always confirm this first to avoid wasting anyone’s time. How far in advance do we need to book? How many other weddings will you photograph that same weekend? Will you personally be the one photographing our wedding, or could it be an associate? Will you have an assistant or second shooter with you? How many hours of coverage are included? What time will you arrive, and when do you typically wrap up? Are you willing to travel to our venue, and is there a travel fee? What will you wear on our wedding day? This matters more than you think, especially for formal events. Questions About Photography Style and Approach Style compatibility is crucial. You need to love the way your photographer sees the world. How would you describe your photography style? (Documentary, editorial, traditional, fine art, photojournalistic, etc.) Do you lean more toward posed portraits or candid moments? How do you handle group formal shots? Do they use a shot list? How do you approach low-light situations? (Receptions, evening ceremonies, indoor venues) How do you prepare for a shoot at a new location? What is your approach to directing couples who are camera-shy? Do you scout the venue beforehand? How do you capture details (rings, invitations, decor) without being disruptive? Questions About Pricing, Packages, and Contracts Money conversations can feel awkward, but they are absolutely necessary. Be direct and thorough. Question Why It Matters What packages do you offer, and what is included in each? Helps you compare apples to apples across photographers. What is your starting price for wedding coverage? Sets the baseline for your budget planning. Is there a charge for overtime if the day runs long? Prevents surprise fees on an already emotional day. What is the deposit amount, and is it refundable? Protects your finances if plans change. What is the payment schedule? Lets you plan payments alongside other wedding expenses. Are albums, prints, or digital files included, or are they add-ons? Some packages look cheap but lack deliverables. Can we customize a package to fit our needs? Flexibility is a sign of a client-focused photographer. Do you offer engagement session coverage, and is it included? An engagement shoot doubles as a trial run with your photographer. Also, always ask to see the contract before signing. Read every clause. Look for cancellation policies, image usage rights, and liability terms. Questions About Backup Plans and Equipment Things go wrong. Weather changes. Equipment fails. A professional photographer will have plans for every scenario. What happens if you get sick or have an emergency on our wedding day? Do you have a network of backup photographers you can call? What camera equipment do you use? Do you carry backup camera bodies and lenses? How do you back up our photos during and after the event? Do you have professional liability insurance? Many venues now require this. A photographer who hesitates on backup plan questions is a red flag. Full stop. Questions About Editing and Final Delivery The work does not end when the wedding day is over. Post-production is where your images truly come to life. What is your editing style? (Bright and airy, dark and moody, true to color, film-inspired, etc.) Can we request specific edits or color tones? How many final edited images can we expect? Will we receive sneak peeks, and how soon after the wedding? When will our full gallery be delivered? Industry standard is typically 4 to 8 weeks. In what format will the images be delivered? (Online gallery, USB drive, cloud download) Do we receive full printing rights? How long will our images be stored on your end? Do you offer black and white versions as well? A Note on Turnaround Times If a photographer promises your full gallery in under two weeks, ask how. Rushing edits can compromise quality. On the other hand, if turnaround stretches beyond 12 weeks, you might want to ask why. Questions About the Wedding Day Experience Your photographer will be by your side for most of the day. Make sure working together will feel natural. What is it like to work with you on the wedding day? How do you handle family

What Questions to Ask a Wedding Photographer Before Booking Read More »

Burgundy and Blush Wedding Color Palette: Decor, Flowers, and Design Ideas

Why the Burgundy and Blush Wedding Color Palette Still Works in 2026 Some color combinations earn their place in the wedding world and never truly leave. The burgundy and blush wedding color palette is one of them. Rich, romantic, and endlessly versatile, this pairing brings together the warmth of deep wine tones with the softness of pale pink to create a look that feels both elegant and inviting. You might have seen chatter online asking whether burgundy and blush feels “dated” or stuck in the late 2010s. The honest answer? It depends entirely on how you execute it. In 2026, couples are breathing fresh life into this palette by layering in unexpected textures, modern stationery design, and organic floral styles that feel anything but cookie-cutter. This guide walks you through every design element, from the ceremony backdrop to the reception table, with a special focus on what photographs beautifully so your wedding album looks as stunning as the day itself. Building a Cohesive Burgundy and Blush Color Scheme The secret to making this palette feel intentional rather than random is layering your shades. Burgundy and blush are not just two flat colors. They each exist on a spectrum, and the more you explore that spectrum, the richer your wedding design becomes. Shades to Include in Your Palette Burgundy Family Blush Family Accent Options Deep wine Soft blush pink Gold (matte or metallic) Merlot Dusty rose Navy blue Maroon Champagne pink Sage or eucalyptus green Dark cranberry Mauve Ivory or cream Oxblood Peach-pink Terracotta (for a modern twist) Using three to five shades from across these families, plus one or two accent tones, creates visual depth that keeps the eye moving and photographs with gorgeous dimension. What Colors Go With Burgundy and Blush? This is one of the most commonly asked questions, and the answer opens up a world of creative possibilities: Gold adds warmth and a touch of glamour, perfect for flatware, candle holders, and invitation foil accents. Navy blue creates a sophisticated contrast, especially in groomsmen attire and table linens. Sage green and eucalyptus bring an organic, garden-inspired quality that keeps the palette grounded. Ivory and cream serve as the perfect neutral base for tablecloths, draping, and the bridal gown itself. Terracotta or copper give the palette a modern, earthy feel that works beautifully for 2026 and 2027 weddings. The colors you should generally avoid pairing with burgundy include bright orange, electric blue, and neon shades, as these clash with the sophisticated, muted warmth that makes this palette sing. Ceremony Design in Burgundy and Blush Your ceremony sets the emotional tone for the entire day, and it is also where your photographer captures some of the most important images. Here is how to weave the palette into this space. Ceremony Backdrop Ideas A wooden arch draped with asymmetrical florals in burgundy dahlias, blush garden roses, and trailing greenery Sheer blush fabric panels flanking the altar with burgundy floral clusters at each tie-back point A circle arch (still trending in 2026) half-covered with an ombre arrangement moving from deep wine at the base to soft blush at the top Candle-lined aisles using pillar candles in blush and ivory holders with burgundy rose petals scattered on the ground Photography Tip for the Ceremony Deep burgundy can absorb light in dim spaces, so if your ceremony is indoors or in a heavily shaded area, balance your florals with more blush and cream than burgundy. This keeps the scene looking luminous rather than heavy in photos. Outdoor golden-hour ceremonies, on the other hand, make burgundy absolutely glow. Flowers That Photograph Beautifully in This Palette Floral choices can make or break your color palette. The right blooms bring texture, movement, and that organic beauty that no amount of fabric or paper decor can replicate. Best Burgundy Flowers for Weddings Burgundy dahlias – dramatic, full-bodied, and stunning as a focal bloom in bouquets Deep red ranunculus – delicate layers that catch light beautifully Black baccara roses – a dark, velvety burgundy rose that adds sophistication Burgundy scabiosa – wispy and textural, perfect as a filler with character Astilbe in wine tones – feathery texture that adds movement to arrangements Best Blush Flowers for Weddings Blush garden roses – the quintessential romantic bloom, full and fragrant Pink peonies – lush and luxurious (check seasonal availability with your florist for summer weddings) Quicksand roses – a dusty blush-beige tone that blends perfectly with both burgundy and cream Sweet peas in pale pink – delicate and whimsical, great for bouquet trailing Lisianthus in soft pink – a budget-friendly alternative to roses with a similar look Greenery and Filler to Tie It Together Eucalyptus (silver dollar or seeded) for a soft gray-green tone Italian ruscus for structured trailing Dusty miller for a silvery, velvety leaf texture Burgundy-tipped leucadendron for foliage that matches your palette Photography note: Bouquets with a mix of tight and loose blooms, combined with trailing greenery, create the kind of dimension that looks incredible in both close-up detail shots and wide ceremony photos. Avoid perfectly round, uniform arrangements as they tend to look flat on camera. Bridesmaids Dresses: Getting the Tones Right Your bridal party is a major visual element throughout your wedding photos, so the dress colors and styles matter enormously. Popular Approaches for 2026 Matching burgundy dresses – A classic choice that creates a bold, unified look. Opt for different necklines or silhouettes in the same fabric and shade to keep things modern. Mismatched blush and burgundy – Some bridesmaids in blush, some in burgundy. This works especially well with larger bridal parties and creates beautiful contrast in group photos. Ombre effect – Arrange bridesmaids from lightest blush to deepest burgundy for a gradient that photographs stunningly. Blush dresses with burgundy accessories – Blush gowns paired with burgundy shawls, shoes, or bouquets keep the bridal party soft while still honoring the palette. Fabric Considerations Fabric Best For Photo Quality Chiffon Outdoor and garden weddings Catches light and movement beautifully Velvet Fall and winter

Burgundy and Blush Wedding Color Palette: Decor, Flowers, and Design Ideas Read More »

Wedding Sparkler Exit Photos: How to Capture the Perfect Shot

Wedding Sparkler Exit Photos: The Ultimate Step-by-Step Guide for Couples and Photographers Few moments at a wedding are as magical as a sparkler exit. The couple walks through a tunnel of golden light, guests cheering on each side, and the photographer captures that one breathtaking frame. But behind every stunning wedding sparkler exit photo is careful planning, the right gear, and solid coordination. Whether you are a couple dreaming of that glowing send-off or a photographer determined to nail the shot, this guide walks you through everything you need to know to make your sparkler exit unforgettable. Why Sparkler Exits Make Incredible Wedding Photos Sparkler exits combine movement, light, emotion, and celebration into a single frame. They create a cinematic, almost fairy-tale atmosphere that flat-lit posed portraits simply cannot match. When done right, they become the signature image of the entire wedding album. But sparkler exits are also one of the most technically challenging moments to photograph. You are working with low light, live fire, a moving couple, and dozens of excited guests. That is exactly why preparation matters so much. Step 1: Choose the Right Sparklers Not all sparklers are created equal. The length of your sparklers directly impacts how much time you have to capture the shot and how dramatic the light will look. Sparkler Length Approximate Burn Time Best For 10 inches 30-40 seconds Very small groups (under 20 guests) 18 inches 1.5 minutes Average-sized weddings (50-120 guests) 20 inches 2 minutes Large weddings or multiple photo passes 36 inches 3-4 minutes Extra-large weddings or extended photo sessions Our recommendation: 18-inch or 20-inch sparklers are the sweet spot for most weddings. They burn long enough to give the photographer multiple chances and keep the tunnel of light glowing while the couple walks through. Always purchase wedding-grade or event-grade sparklers that produce a gold or warm-white light with minimal smoke. Avoid cheap novelty sparklers, which tend to burn unevenly, produce more smoke, and give off a harsh, blue-white light that does not photograph well. Step 2: Plan the Timing and Location Sparkler exits work best when the surroundings are dark. That means scheduling them for later in the evening, ideally after sunset. If you are having a summer wedding where the sun sets late, coordinate with your DJ or wedding planner to push the exit closer to 9:30 or 10 PM. Choosing the Right Spot Pick a wide, open area so guests can form two lines with enough space for the couple to walk between them comfortably. Avoid areas with overhead foliage, fabric draping, or low ceilings. Sparklers produce live sparks that can ignite flammable materials. Look for a background that is dark rather than a well-lit parking lot. Dark backgrounds make the sparkler light pop. Consider using available ambient light sources like string lights or lanterns nearby. These can add atmosphere and depth to your wedding sparkler exit photos without overpowering the sparkler glow. Step 3: Coordinate Your Guests This is where many sparkler exits fall apart. Without clear instructions, guests light their sparklers too early, hold them at awkward angles, or scatter instead of forming a clean line. Here is how to avoid the chaos. Before the Exit Assign a coordinator (your wedding planner, best man, DJ, or a trusted friend) to organize the guests outside. Pre-distribute sparklers and lighters/long-reach lighters while guests are still inside. Have one lighter or torch for every 4-5 people. Brief the guests. Your coordinator should tell everyone: Form two lines facing each other, about 5-6 feet apart. Do NOT light sparklers until the signal. Hold sparklers UP and slightly angled toward the center to create a tunnel of light. Keep sparklers away from hair, clothing, and faces. Stay in position until the couple has passed and the photographer gives the all-clear. Light sparklers from back to front. Start lighting at the far end of the tunnel (where the couple will exit) and work toward the entrance. This ensures the sparklers at the end are still burning brightly when the couple arrives. Pro Tip for Couples Walk slowly. Your instinct will be to rush through the tunnel in excitement, but your photographer needs you to move at a relaxed, even pace. Look at each other, smile, laugh, maybe pause for a kiss in the middle. The best wedding sparkler exit photos capture genuine emotion, and that happens when you take your time. Step 4: Camera Settings for Sparkler Exit Photography This section is primarily for photographers, but couples should understand the basics too so they know what to expect. Sparkler exits are a low-light scenario with bright point-light sources. You need settings that expose for the sparklers without blowing them out, while still capturing enough detail on the couple. Recommended Starting Settings Setting Recommended Value Notes Aperture f/2.0 to f/2.8 Wide open to let in maximum light. A fast prime lens (35mm, 50mm, or 85mm) is ideal. Shutter Speed 1/200s to 1/500s (with flash) or 1/60s to 1/125s (no flash) Faster shutter freezes sparks as dots. Slower shutter creates light trails. ISO 800 to 3200 Adjust based on your camera body’s noise performance. Modern mirrorless cameras handle ISO 3200 well. Focus Mode Manual focus or AF with assist Autofocus may hunt in the dark. Pre-focus on the spot where the couple will walk. White Balance Around 3200-3800K (tungsten/warm) Sparklers produce warm light. Setting a slightly warm white balance preserves the golden tone. To Flash or Not to Flash? This is one of the biggest debates among wedding photographers when it comes to sparkler exits. Here is a quick breakdown: No flash: Gives a more natural, ambient look. The sparklers become the dominant light source. Works well if you have many sparklers and a fast lens. Risk: the couple’s faces may be underexposed. Rear-curtain flash (dragging the shutter): Fires the flash at the end of the exposure, freezing the couple while the sparklers create light trails. This is the technique many pros prefer because it balances subject exposure with sparkler drama.

Wedding Sparkler Exit Photos: How to Capture the Perfect Shot Read More »

How to Photograph a Wedding in a Dark Church: Camera Settings and Tips

Wedding Photography in a Dark Church: Why It’s One of the Hardest Challenges You’ll Face If you’ve ever walked into a centuries-old stone chapel or a dimly lit cathedral minutes before a wedding ceremony, you already know the feeling: a knot in your stomach and a quick mental calculation of just how little light you have to work with. Dark church wedding photography is one of the most demanding situations any photographer can face. Between strict no-flash policies, unpredictable mixed lighting, constant movement, and the pressure to deliver flawless images of a once-in-a-lifetime event, the margin for error is razor-thin. This guide is built to help you walk into any dimly lit church with confidence. We’ll cover exact camera settings, the best lenses for the job, practical techniques for handling tricky lighting, and real-world tips that go beyond the basics. Whether you’re a working wedding photographer or an enthusiastic friend who’s been asked to shoot the ceremony, this post has you covered. Understanding the Challenges of Dark Church Ceremonies Before we dive into settings and gear, it helps to understand exactly why dark churches are so difficult. Identifying the specific challenges allows you to prepare targeted solutions. 1. No-Flash Policies Most churches do not allow flash during the ceremony. This is not just a preference; many officants and venues consider it distracting and disrespectful. Flash can also completely destroy the natural ambiance of a candlelit or softly lit space. You need to be prepared to shoot the entire ceremony using available light only. 2. Extremely Low Light Levels Historic chapels, stone churches, and older cathedrals can be staggeringly dark. Stained glass windows that look beautiful to the eye may let in very little usable light. You might find yourself working at light levels several stops below what you’d encounter in a typical indoor venue. 3. Mixed and Uneven Lighting Church lighting often comes from multiple sources at different color temperatures: warm tungsten overhead fixtures, cool daylight filtering through windows, orange candlelight, and sometimes colored light from stained glass. This makes white balance a constant struggle. 4. Movement During the Ceremony The couple walks down the aisle, hands are joined, rings are exchanged, the first kiss happens. These are fleeting, unrepeatable moments that demand fast shutter speeds to freeze. In low light, achieving those speeds without blowing out your ISO or losing depth of field is a real balancing act. 5. Distance and Restricted Movement Many churches restrict where photographers can stand during the ceremony. You might be confined to the back of the church or the side aisles, which means you need longer focal lengths and can’t simply “get closer” to compensate for dim conditions. Best Camera Settings for Wedding Photography in a Dark Church Here is a solid starting point for your camera settings when shooting a ceremony in a dark church. These are not rigid rules but reliable baselines you can adjust depending on your exact conditions. Setting Recommended Value Why Shooting Mode Manual (M) Full control over exposure in tricky, changing light Aperture f/1.4 to f/2.8 Lets in the maximum amount of light; creates beautiful background blur Shutter Speed 1/125s to 1/200s Fast enough to freeze gentle movement (walking, gestures) ISO 1600 to 6400 (or higher) Modern cameras handle high ISO remarkably well; don’t be afraid to push it Metering Mode Spot or Center-Weighted Prevents bright windows or candles from fooling the meter Focus Mode Continuous AF (AF-C / Servo) Tracks subjects as they move through the ceremony White Balance Auto or Custom Kelvin (around 3200-4000K) Shoot RAW and fine-tune in post; Auto WB often struggles in mixed light File Format RAW (always) Maximum flexibility for recovering shadows, adjusting WB, and reducing noise in post A Note on Auto ISO Many experienced wedding photographers use Auto ISO with a maximum cap (for example, Auto ISO capped at 8000 or 12800) combined with manual aperture and shutter speed. This gives you consistent exposure across varying light conditions as you move around the church, while still keeping noise within an acceptable range. It’s an excellent approach if your camera body handles high ISO well. Best Lenses for Dark Church Wedding Photography Your lens choice matters more than your camera body in low-light church photography. A fast lens (one with a wide maximum aperture) is your most powerful weapon against darkness. Prime Lenses (Top Picks) Fast prime lenses are the go-to choice for dark church ceremonies. Their wide apertures let in significantly more light than most zoom lenses, and they tend to produce sharper results at their maximum aperture. 35mm f/1.4 – Excellent for wider environmental shots showing the church interior and the couple in context. 50mm f/1.2 or f/1.4 – A classic, versatile focal length. Great for ceremony shots from a moderate distance. 85mm f/1.4 or f/1.2 – Ideal for tighter portraits and detail shots from farther away. Beautiful subject separation at wide apertures. 135mm f/1.8 or f/2 – Perfect when you’re stuck at the back of the church and need to reach the altar. Stunning compression and bokeh. Zoom Lenses (Practical Options) If you prefer the flexibility of zooms or need to minimize lens changes during the ceremony: 24-70mm f/2.8 – The workhorse zoom for wedding photography. At f/2.8, it’s usable in dark churches but you’ll need to push ISO higher than with a prime. 70-200mm f/2.8 – Essential when you can’t get close to the altar. The constant f/2.8 aperture keeps things manageable. Prime vs. Zoom: Quick Comparison for Dark Churches Factor Fast Prime (f/1.2 – f/1.8) Pro Zoom (f/2.8) Light Gathering Excellent (2-3 stops advantage) Good Flexibility Limited (fixed focal length) Excellent Depth of Field Control Superior background blur Good background blur Weight & Size Generally lighter Heavier Best For Very dark churches, beautiful bokeh Versatility, varying distances Pro tip: Many wedding photographers use a dual-body setup. One camera with a 35mm or 50mm prime for wide and mid shots, and a second camera with an 85mm or 135mm prime (or a 70-200mm f/2.8) for

How to Photograph a Wedding in a Dark Church: Camera Settings and Tips Read More »